Key takeaways
- At enterprise scale, Search Console is governed infrastructure: a property map, an owner and token registry, and scheduled access reviews.
- Use one Domain property per registrable domain, with URL-prefix child properties for each market, section, or team.
- When people leave, remove their verification tokens as well as their access, and audit Ownership history quarterly.
- Turn on bulk data export to BigQuery early: it doesn’t backfill, and Search Console keeps only 16 months of data.
- Set the Search generative AI control at the top-level property and document every child override.
For a single small site, Google Search Console is a tool you check once a month. For an enterprise with several domains, regional teams, agencies, and a data warehouse, it’s infrastructure. The hard problems stop being “what does this report mean?” and become “who owns this property?”, “why did nobody see that alert?”, and “where did last year’s data go?”
This guide covers how to run Search Console at enterprise scale: property architecture, access governance, alerts, bulk data export, API limits, the new generative AI controls, and a review cadence that holds up. Every limit and setting below comes from Google’s current Search Console documentation.
Key points
- Treat Search Console as governed infrastructure: a property map, an owner registry, and scheduled access reviews.
- Build one Domain property per registrable domain, then URL-prefix child properties for each market, section, or team.
- Removing a person isn’t enough. Remove their verification tokens too, or they can re-verify.
- Turn on bulk data export to BigQuery early. It doesn’t backfill history.
- Set the Search generative AI control at the top-level property, and document every child override.
Step 1: Map your properties before you add more
Search Console has two website property types. A Domain property (example.com) covers every subdomain and protocol and can only be verified through DNS. A URL-prefix property (https://www.example.com/fr/) covers only URLs under that exact prefix, including the protocol.
The enterprise pattern is a tree:
- One Domain property per registrable domain as the umbrella. It catches everything, including subdomains a team launched without telling anyone.
- URL-prefix child properties for each market folder, business unit, or subdomain that needs its own reporting or its own users. Google’s own example is a travel site with separate properties for
/france/,/ireland/, and/spain/.
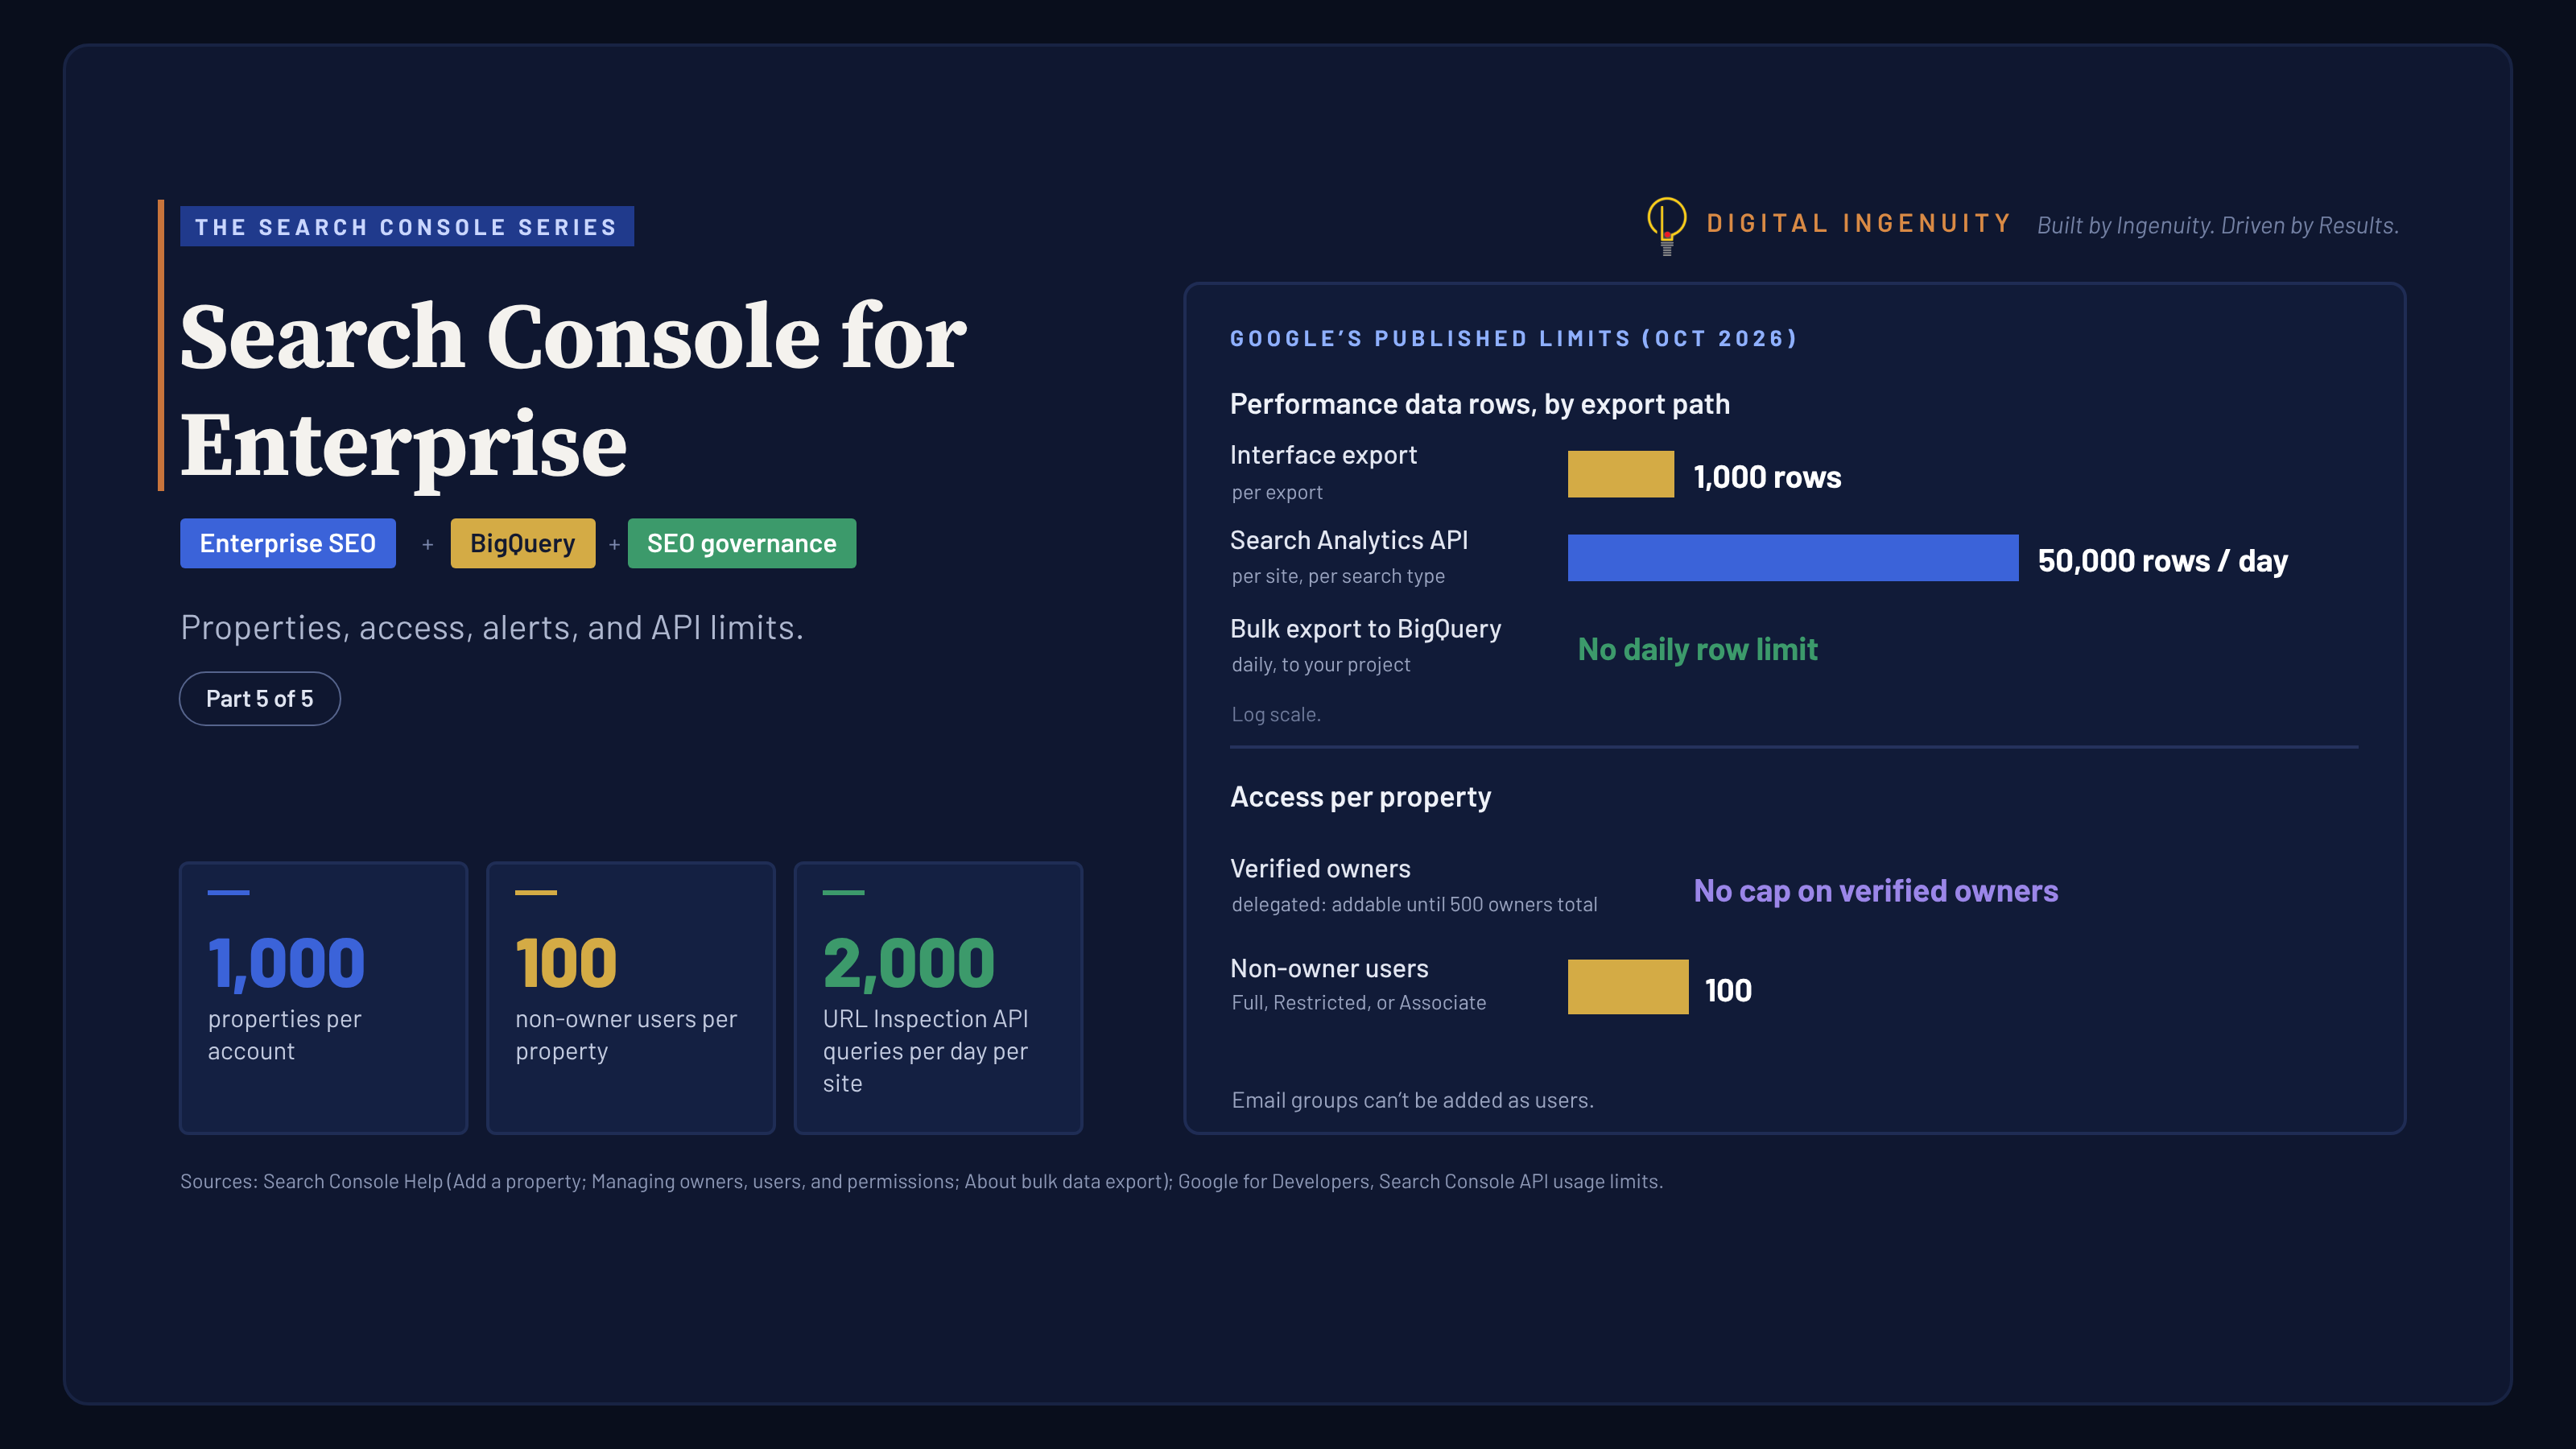
Child properties you add after verifying the parent are verified automatically using the parent’s method. One account can hold up to 1,000 properties, which is plenty for most organizations but worth knowing if you build properties per folder.
Some reports only exist at the root. The Crawl Stats report works only on root-level properties (a Domain property or a root URL-prefix property). At the Domain level it shows crawling across all child domains, with only the top 20 child domains that received traffic in the past 90 days listed individually. Plan root-level properties for any host your infrastructure team needs to monitor.
Step 2: Govern ownership and access like a security control
Search Console permissions come in four levels:
- Owner, either verified (holds a verification token) or delegated (granted ownership by a verified owner, no token).
- Full user: views all data and can take some actions.
- Restricted user: views most data.
- Associate: can take certain actions on behalf of the site or access certain data, but can’t open Search Console or view its data directly.
Only owners can add or remove users. Each property allows up to 100 non-owner users. Verified owners have no maximum, but you can only add delegated owners until the property reaches 500 verified plus delegated owners. Users need a valid Google Account, and an email group can’t be added as a user, so access is always tied to named people or service accounts.
The rules that matter most at scale:
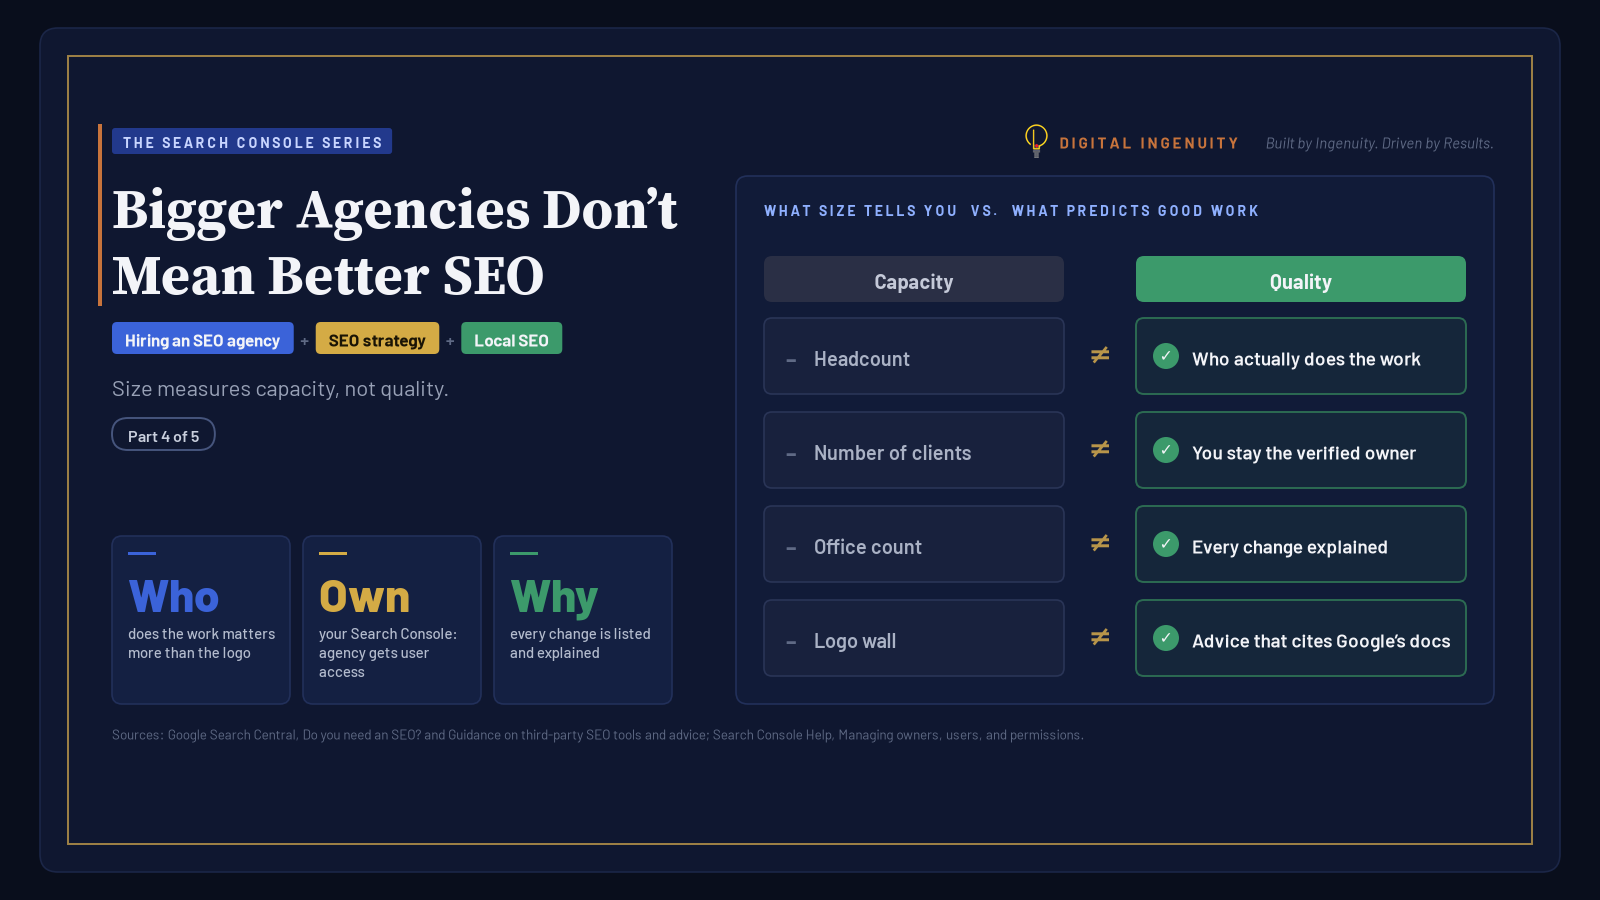
- Keep verified ownership on a few company-controlled accounts. Give everyone else delegated ownership or Full/Restricted access. If every verified owner is removed, everyone else loses access after a grace period. Data keeps collecting, but nobody can see it until someone verifies again.
- Remove tokens on offboarding. When you remove a verified owner, delete every verification token they used, or they can re-verify. Google notifies current owners if that happens.
- Audit Ownership history. Settings → Users and permissions lists unused ownership tokens and an ownership history of owners added and removed and verification attempts. Google says an owner you don’t recognize may mean the site was hacked, and that a hacker can probably add their token back after you remove it.
- Keep an owner registry outside Search Console: property, verified owners, verification method, where each token lives (DNS, HTML file, tag), and the business owner accountable for it.
Step 3: Route alerts to people who act on them
Google says there’s no need to sign in every day: when it finds new issues on your site, Search Console emails you. That’s only useful if the email reaches someone with the authority to fix it.
Because email groups can’t be users, map each property to named individuals: the technical SEO lead, the platform engineer for that site, and the regional marketing owner. When an issue is fixed, use Validate fix in the report. Validation typically takes up to about two weeks, sometimes much longer, and you’re notified when it succeeds or fails.
Step 4: Turn on bulk data export to BigQuery
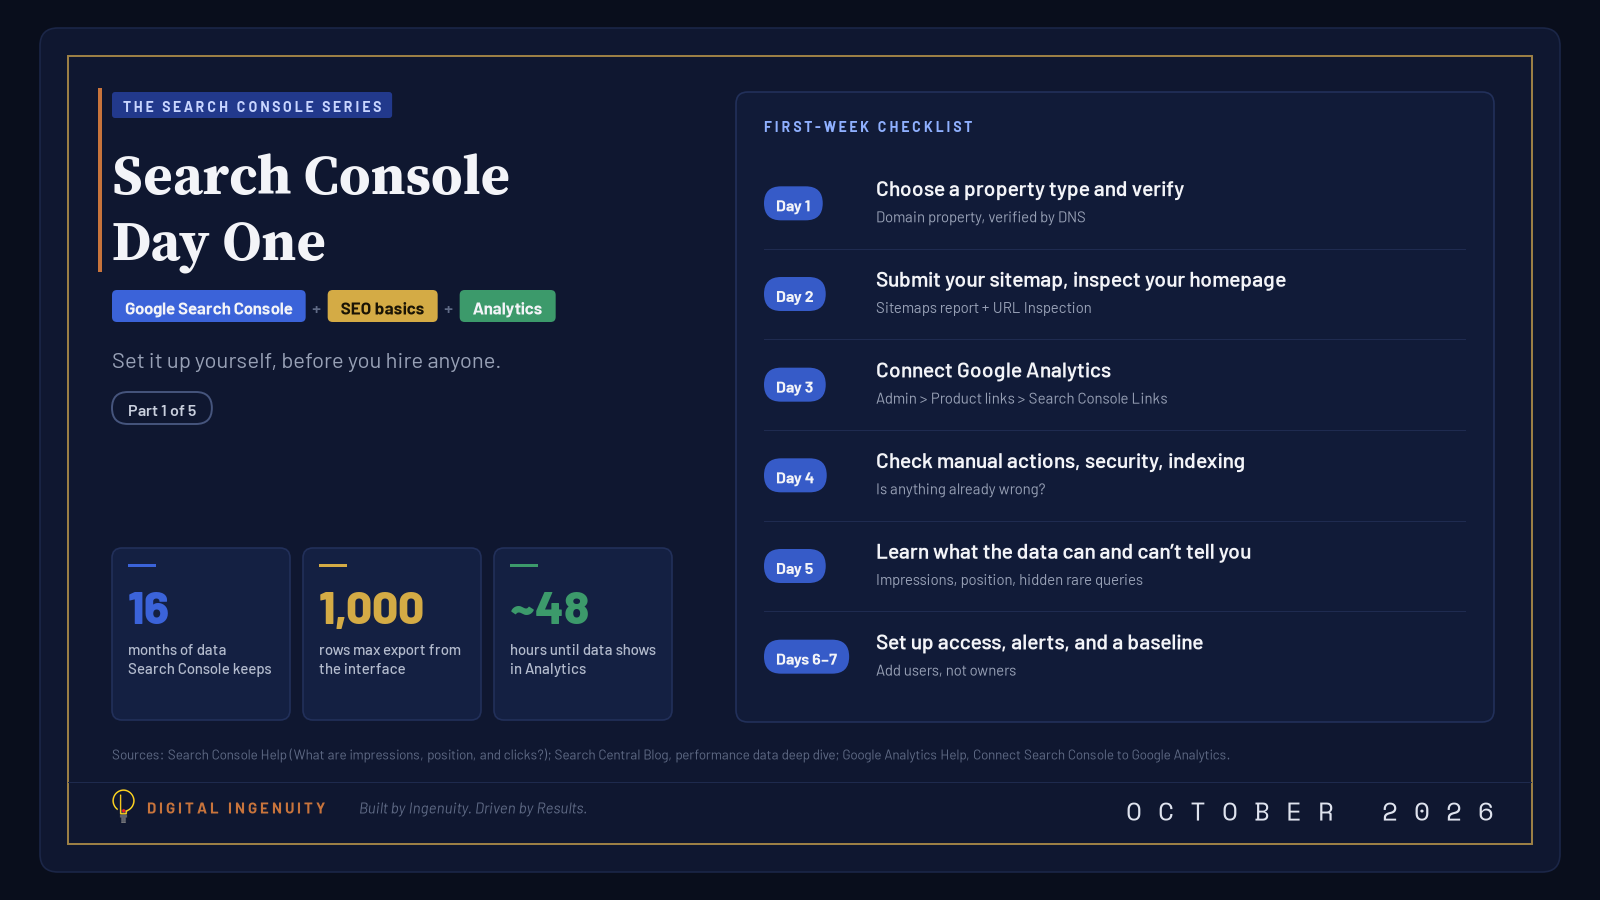
The Search Console interface exports at most 1,000 rows, and the Search Analytics API returns up to 50,000 rows per day per site per search type. Large sites outgrow both. Bulk data export sends your performance data to BigQuery every day, including everything except anonymized queries, without the API’s daily row limit. Google designed it for large websites with tens of thousands of pages or queries; small and medium sites already get their data through the interface, Looker Studio, or the API.
Setup, from Google’s documentation:
- In Google Cloud, use a project with billing, and enable the BigQuery API and BigQuery Storage API.
- Grant the service account
search-console-data-export@system.gserviceaccount.comtwo roles: BigQuery Job User and BigQuery Data Editor. - In Search Console, go to Settings → Bulk data export, enter the Cloud project ID (not the project number), and choose a dataset name. It always starts with
searchconsole; give each property its own name if several export to one project. - Pick the dataset location carefully. You can’t easily change it once exports begin.
Only property owners can set this up. The first export arrives up to 48 hours after setup and covers that day. There’s no backfill. For earlier history, Google points you to the API or the reports. Since Search Console keeps 16 months of data, every month you wait is a month of unsampled detail you’ll never get in BigQuery.
Running it well:
- Use partition expiration, not table expiration. Tables and partitions are kept forever by default and BigQuery storage costs money beyond the free tier. If you set an expiration, put it on partitions, at 14 days or longer. Don’t change the table schema (for example, by adding a column), because that makes exports fail.
- Always aggregate. Rows have repeated keys, so sum metrics rather than reading rows directly. Average position is
SUM(sum_position) / SUM(impressions) + 1, because the exported position is zero-based. - Monitor the
ExportLogtable. It records successful exports only, so a missing day is the signal. After a non-transitory error such as a permissions problem, Search Console retries a missed day for about a week, then gives up on it. - Know the published gaps. Google’s Data anomalies page notes that February 28 and March 1, 2026 are missing from bulk exports for some properties.
Step 5: Design API jobs around the quotas
If you pull data through the Search Console API instead of (or alongside) bulk export, the limits shape the design. From Google’s usage limits page:
| API | Per-site limits | Per-project limits |
|---|---|---|
| Search Analytics | 1,200 queries per minute (also 1,200 QPM per user) | 30,000,000 queries per day; 40,000 QPM |
| URL Inspection | 2,000 queries per day; 600 QPM | 10,000,000 queries per day; 15,000 QPM |
Google also applies load quotas, and queries grouped by both page and query over long date ranges are the most expensive. Its recommended pattern is a daily query for one day of data, paged in 25,000-row steps with startRow. Data is typically available after two to three days.
At 2,000 inspections per site per day, the URL Inspection API is for sampling priority templates and recently changed URLs, not crawling a large site end to end.
Step 6: Catch lost pages and update-driven drops early
Two failure modes do the most damage at enterprise scale: important pages quietly dropping out of the index, and traffic shifts that nobody connects to a Google update.
For lost pages, submit sitemaps per section and use the sitemap filter in the Page indexing report (All known pages, All submitted pages, Unsubmitted pages only, or a specific sitemap). Example URL lists are capped at 1,000 rows, so segmenting by sitemap is how you see a full section. Google’s tip: when validating a fix, use a sitemap of only your most important pages so validation finishes faster. For individual URLs, use the URL Inspection tool.
For update-driven drops, check the Google Search Status Dashboard before diagnosing anything else. It lists ranking updates such as core and spam updates with their dates. Google’s guide to debugging traffic drops recommends setting the Performance report to the last 16 months to rule out seasonality, and separating small position drops (for example, from position 2 to 4) from large ones before deciding what to do.
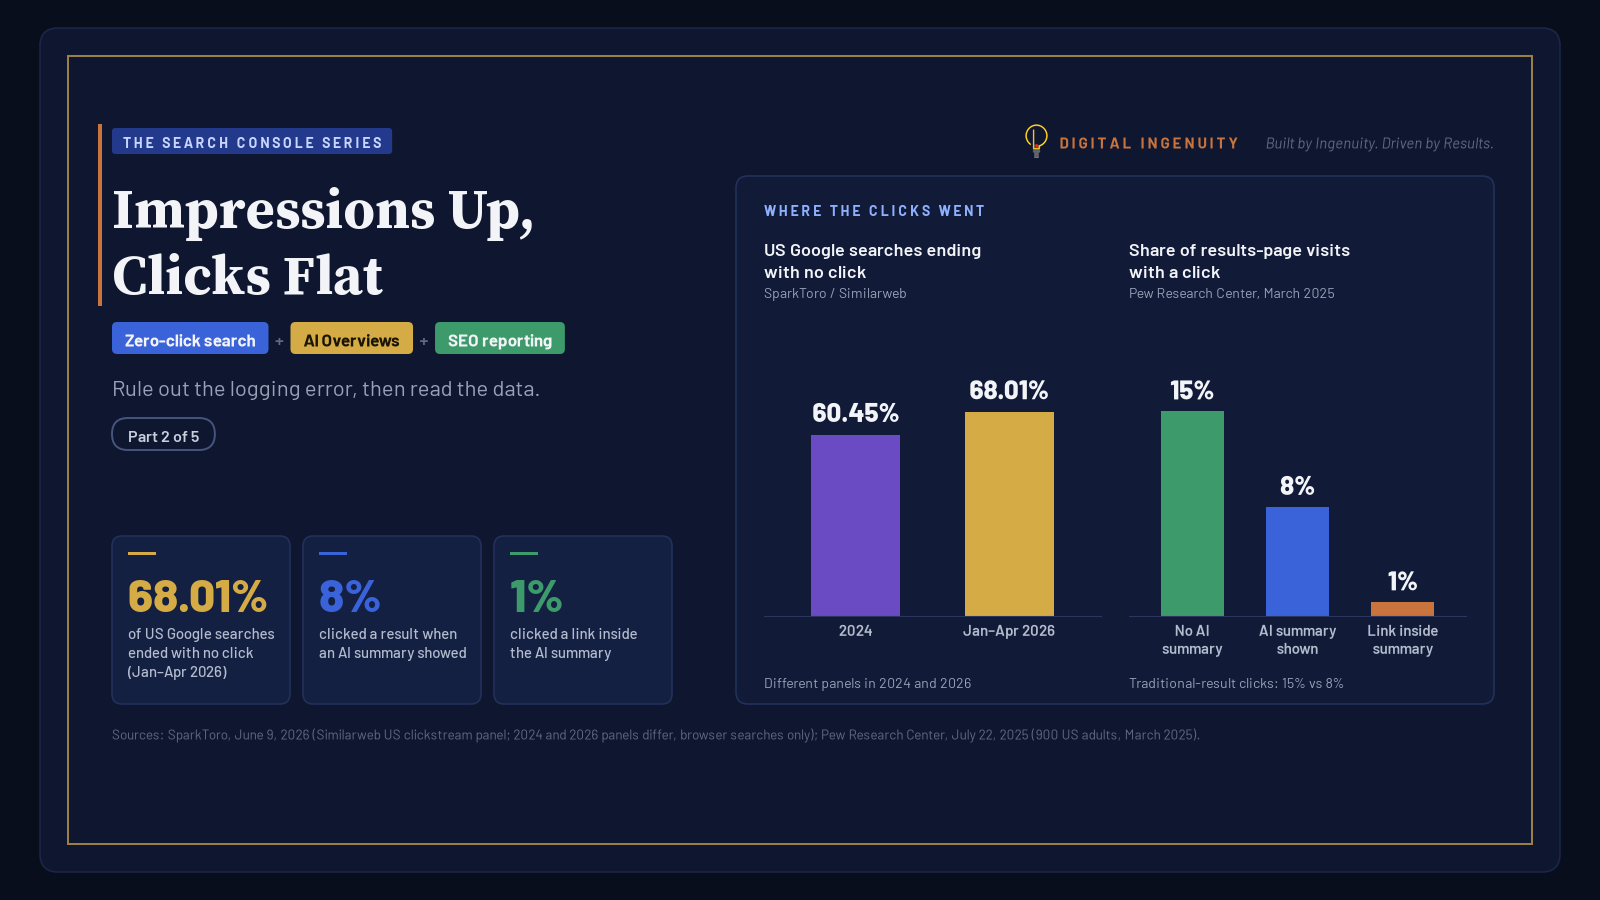
Also check the Data anomalies page. Google says a logging error misreported impressions, CTR, and average position from May 13, 2025 to April 27, 2026 (clicks weren’t affected), and that history won’t be corrected. Any year-over-year impressions dashboard spanning that window needs an annotation. We explain the reporting side in Impressions Up, Clicks Flat.
Step 7: Set the Search generative AI control centrally
Each property has a control under Settings → Search generative AI that decides whether its content can appear in AI Overviews, AI Mode, and generative AI features in Google Discover. Include is the default. Google says excluding content isn’t used as a ranking signal elsewhere in Search, and that exclusion takes effect within one to two days, sometimes longer.
For enterprises, inheritance is the part to govern. A property inherits the control from its closest parent that has set its own; if none has, it inherits from the top-level Domain property. A regional team can override the setting on its child property, and owners of the top-level property see a notification when that happens.
Make this a documented decision: set the control at the top-level property, record any child override with the reason and an approver, and review overrides quarterly. Pair it with the Generative AI performance report, which shows impressions in those features by page, country, device, and date.
Step 8: Put the review cadence on the calendar
Google says most site owners don’t need to log in daily and can check about once a month. At enterprise scale, a layered rhythm works better. This is the cadence we recommend:
| Cadence | What to review | Who |
|---|---|---|
| Weekly | Alert emails, ExportLog gaps, Page indexing for priority sitemaps, Status Dashboard | Technical SEO lead |
| Monthly | Performance by property and segment, branded vs. non-branded clicks, Generative AI report | SEO and marketing owners |
| Quarterly | Users, owners, unused tokens, and Ownership history; generative AI control overrides; property map | SEO lead with IT or security |
| Before any migration or launch | Property coverage, sitemaps, and baselines exported | SEO, engineering, analytics |
The last row is where enterprise Search Console usually fails. If you’re planning a replatform, read our checklist for technical SEO before a site migration first.
Where this fits
Enterprises rarely struggle with what Search Console says. They struggle with who can see it, whether the data survives, and whether anyone acts on it. The same foundations from our Search Console Day One checklist apply, just with more properties, more people, and higher stakes. For a refresher on reading each report, see our Search Console walkthrough.
That’s the work our enterprise and multi-location teams do, from franchise head offices to regional groups across Plano and the wider Dallas-Fort Worth area.
Running Search Console across several sites, brands, or regions? Contact us for more information.
Sources
- Add a website property to Search Console (Search Console Help)
- Verify your site ownership (Search Console Help)
- Managing owners, users, and permissions (Search Console Help)
- Crawl Stats report (Search Console Help)
- Get started with Search Console (Google Search Central)
- Page indexing report (Search Console Help)
- Bulk data export of Search Console performance data (Search Central Blog)
- About bulk data export (Search Console Help)
- Start a new bulk data export (Search Console Help)
- Bulk data exports: tables and tips (Search Console Help)
- Search Console API usage limits (Google for Developers)
- Getting your performance data (Search Console API)
- A deep dive into Search Console performance data filtering and limits (Search Central Blog)
- Debugging drops in Google Search traffic (Google Search Central)
- Google Search Status Dashboard
- Data anomalies in Search Console (Search Console Help)
- Search generative AI control (Search Console Help)
- Generative AI performance report (Search Console Help)